The crystal label production process integrates material properties and printing technology. Its core approach is to achieve efficient labeling of various shaped and curved objects through multi-layer lamination, precise printing, and peel-and-transfer technology. The following is a detailed breakdown of the process steps:
I. Material Preparation
The basic materials for a crystal label consist of four core components: the substrate, printed layer, adhesive layer, and release layer. Functional layers (such as anti-counterfeiting and wear-resistant layers) may be added as needed:
The substrate: Typically a transparent PET film (50-100μm thick), with stretch and high-temperature resistance, serves as the carrier for the printed image.
The printed layer: Uses UV ink (fast curing and high-color saturation) or specialty inks, which must adhere well to the substrate.
The adhesive layer: This includes transferable pressure-sensitive adhesive (which can be separated from the substrate after lamination) and final adhesive (selected based on the material of the object being labeled, such as strong adhesive for glass and low-viscosity adhesive for plastic).
Release layer: Mostly made of release paper or film, the surface is treated with silicone oil to ensure smooth peeling of the adhesive layer.
II. Core Production Steps
- Pretreatment: Surface Treatment of the Printing Layer
The PET printing film is treated with corona or coating to increase surface tension, ensuring even ink adhesion and preventing bubbles and bleeds during printing. - Digital Printing: Precise Design
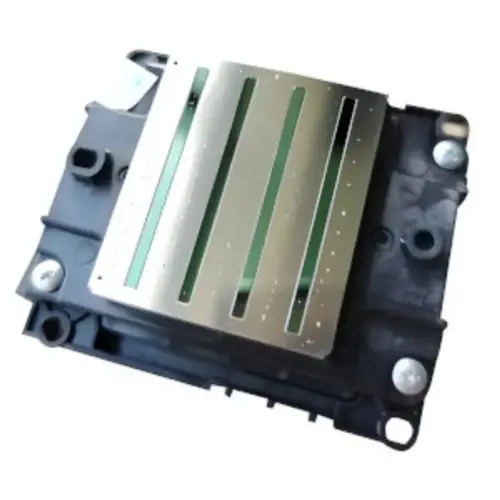
- Using a UV flatbed printer or digital inkjet printer, designs (text, logos, anti-counterfeiting labels, etc.) are printed directly on the surface of the printing layer.
- Advantages: No plate making required, supports small-batch customization and complex designs (gradient colors, high-definition portraits, etc.), achieves printing accuracy exceeding 1200 dpi, and offers excellent color reproduction.
- Key: Immediately after printing, the ink is irradiated with a UV lamp (wavelength 365nm) to instantly cure the ink and prevent smearing or deformation of the design.
3. Glue Layer Lamination: Layered Coating
After printing, a thin, even layer of transferable pressure-sensitive adhesive is applied to the design surface to ensure subsequent separation from the printed layer.
In some cases, a functional adhesive layer (such as anti-counterfeiting adhesive or high-temperature-resistant adhesive) may be applied, or a transparent protective film (to enhance wear resistance) may be added.
- Release Layer Lamination: Securement and Protection
Precisely align the glue-coated printed layer and release layer, applying pressure with a roller to ensure a tight bond and prevent air bubbles. The overall structure is now: release layer + glue layer + printed layer + printed layer. - Die-Cutting: Custom Cutting
According to the customer’s desired shape (round, special-shaped, text outline, etc.), a CNC die-cutting machine is used to precisely cut the laminated material, retaining the design and removing excess material. Die-cutting accuracy must be controlled within ±0.1mm to ensure a clean edge when applying the label. - Peel-and-Transfer: Labeling Application
During final application, the printed substrate (PET film) is peeled off, and the printed and adhesive layers are completely transferred to the release layer. The patterned adhesive layer is then peeled off the release layer and directly adhered to the target surface (glass, plastic, metal, etc.), completing the labeling process.
III. Key Process Points
· Ink and Material Matching: The compatibility of the ink with the printed substrate and adhesive must be tested to avoid delamination and peeling after curing.
· Glue Application Uniformity: The adhesive layer thickness (typically 5-20μm) must be consistent. Too thick will cause overflow, while too thin will result in insufficient adhesion.
· UV Curing Parameters: The curing time (0.5-2 seconds) and UV lamp power must be adjusted according to the ink type to ensure complete curing without damaging the material.
· Environmental Control: The workshop must maintain a constant temperature (20-25°C) and low humidity (40%-60%) to prevent moisture from getting into the material or dimensional deformation due to temperature fluctuations.
IV. Process Advantages
Compared to traditional processes like silk-screen printing and hot stamping, the core advantages of crystal label production are:
· Flexible small-batch production: No plate making is required, making it suitable for personalized customization (e.g., small orders of 10-1,000 pieces).
· Adaptability to irregular surfaces: The soft adhesive layer can conform to curved and curved surfaces (such as wine bottles and cosmetic bottles), which is difficult to achieve with traditional lithographic printing.
· High efficiency and low consumption: Digital printing is a one-step process, reducing process and material waste, and shortening production cycles to as little as 24 hours.
Through the above processes, crystal labels achieve the characteristics of “high-definition graphics, strong adhesion, and weather resistance,” making them widely suitable for high-end packaging, gift customization, and other applications.


